Original price
$96.60 SGD
-
Original price
$96.60 SGD
Original price
$96.60 SGD
$96.60 SGD
-
$96.60 SGD
Current price
$96.60 SGD
| /
Descriptions
Descriptions
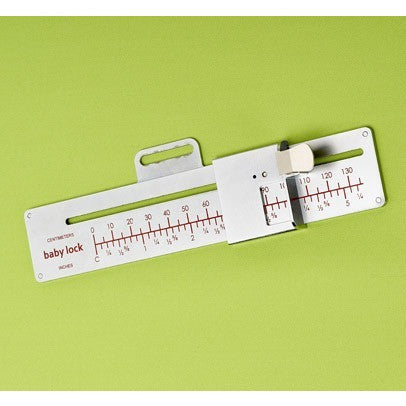
Fabric Guide for Baby Lock Overlock & Coverstitch (B0420S01AE)
Product Overview
The Baby Lock Fabric Guide (B0420S01AE) helps achieve perfectly straight and consistent stitching when using chain stitch and cover stitch functions. The adjustable guide attaches directly to the sewing table, allowing precise fabric alignment for professional-quality results every time.
Ideal for sewing tapes, ribbons, braids, and decorative trims, the guide can be adjusted up to a width of 60mm for maximum versatility.
Compatible Models
Baby Lock Evolve (BLE8W-2)
Baby Lock Evolution (BLE8W-2)
Baby Lock Ovation (BLE8)
Key Features
Original Baby Lock accessory
Provides accurate fabric alignment for chain stitching and cover stitching
Helps achieve straight and consistent stitching lines
Adjustable guide width up to 60mm
Ideal for attaching tapes, ribbons, braids, and decorative trims
Easy installation onto the sewing table
Recommended Machine Settings
Stitch Type: Chain Stitch or Cover Stitch
Needles: C1, C2, C3
Cutting Blade: Disengaged (Locked Position)
Upper Looper: Down Position
Stitch Width: 5.5mm
Stitch Length: Any Setting
Sewing Table: Installed
How to Attach the Fabric Guide
Thread the machine according to the selected stitch type.
Turn the cutting blade to the LOCKED position.
Move the upper looper to the DOWN position.
Remove the blade cover and attach the sewing table.
Secure the fabric guide to the threaded holes on the sewing table using the supplied screws.
How to Align and Use the Fabric Guide
The raised marking on the presser foot toe indicates the needle position and serves as a fabric alignment reference.
Align the "0" line on the fabric guide with both the needle position and the marking on the presser foot.
For accurate setup, lower the needle into the alignment template circle and align the straight guide line with the foot markings and the "0" guide line.
The numbered markings indicate the distance from the needle to the raised edge of the fabric guide.
Adjust the guide to match your desired seam allowance.
Secure the guide firmly to the sewing table.
Guide the fabric edge along the raised edge of the fabric guide while sewing.